
Since earlier April I have been working on my own home. An 1930's ex-council house.
There have been issues with the painted walls flaking badly and the possibility of needing to work away from home made me decide I had to do something.
My Living Room
The room is roughly 6 x 5 metres
Painted in a Magnolia creamy white with Artex from the Picture rail up.August/ Sept 2017
The Fireplace
 |
| Clean and tidied up. |
 |
| Most of the bricks removed |
 |
| Fireplace with gasfire and old back boiler removed And the mantle piece and marble surround. |
 |
| Cleaned up and now I need to get the gasfire cut off and removed. |

Flaking Paint in the Living Room
Most of this flaking was near the chasing in, but not always :(
 |
 |
It wasn't fun and I thought would take forever. This was earlier in the year.
However the stair wall seemed easier, so I decided to work on that instead
 |
| Part way through removing the paint on the stairs. Note the lovely peeling/cracking paint. |
After a week working away on a friends house, removing old wall paper, paint and polystyrene ceiling tiles. I learnt how usefully wallpaper steamer can be, it did shift things;
I got more ambitious.
Where to start? |
| I managed to remove much of the paint on the walls with a lot of elbow grease & sharp blades. The Artex above the picture rail was on to wall paper and so came away with persuasion. A combination of Tiranti scrapers and the X-tex stripper started making a difference. This is the point where I decided to see if the ceiling Artex would come away too. YES |
 |
| Window onto my back garden, Artex starting to shift off the ceiling |
I asked a Plasterer if he would sort out some of the problem areas with the plastering. Ie where the chasing in had been done after the Artex was originally applied. It was messy.
I had removed a lot of the Artex as he thought I seemed to have done that well he said he thought I'd be able to make the repairs myself!!!
Recommended the plaster I needed, told me to remove the mess and work the area back s little then slightly over fill and sand back.
 |
| The lovely mess some of the Artex removed from the chased in area. The black is the base layer of plaster. This was one of the one of the worst but I did this in six different parts of the room. |
 |
| Filled and sanded back, and paint removed from the wall. |
 |
| How it looks now |
 |
| This is the left alcove to the fireplace. This is typical of the ochre yellow paint on the walls, which seems to be covering the entire house. Can only imagine it was a bit dark in the past. There were shelves or a cupboards and shelves in the corner when it was first lived in, I am guessing |
 |
| After I have removed the old paint layer. The environmentally friendly product that acts as a poultice to soften the paint, then scrape it away with a sharp blade. (Originally I intended to use it on the Artex). Still some filling to do. |
 |
| Cleaned up |
 |
| These are the old pipes from a back boiler to the gas fire. I angle ground the copper pipes to this point. The bricks had been thrown in together and a lump of plaster thrown anywhere it would fit. |
 |
| The problem corner on the ceiling. The ceiling had been repaired and then covered in Artex. none of the cracks in the ceiling have been particularly bad I decided to risk removing the old repair and re-filling it. I don't find this difficult. I worked with plaster when I left school and was a trainee Bas-Relief Modeller at Wedgwood. |
 |
| How the plaster looks after sanding down the fills, (wall opposite the fireplace) |
 |
| Same wall part of the alcove, right of the fireplace |
 |
| Filling the holes and the holes from the old chasing in |
 |
| After a bit of cleaning up I am hoping to eventually have a wood burner and the mantle piece is too much for my room It is held in place with No more nails or something similar. Decided I could remove it until the fire is disconnected and it and the back boiler are removed. |
 |
| Obviously I like a challenge. Slid the marble plinth at the base of the gas fire away. It wasn't attached to anything A few years of detritus and a mouse had saved up a few sunflower seeds |
More details of the work I've done.....
 |
| Just testing if I would be able to remove the Artex on the Ceiling |
 |
| Slowly revealing the ceiling |
 |
| Half way? |
 |
| Maybe 2/3 of the way though...... |
 |
| The problem area. This was the only part of the ceiling that wasn't papered so it took a bit more elbow grease to tidy it up |
The Stairs wall
This is how it looks now!
 |
| My friend offered to help remove the old layers of paint So we worked together for one Sunday afternoon. Otherwise I have done all the work myself |
 |
| After some filling but the surface still didn't seem that sound. |
 |
| Stair wall with modern paint removed |
 |
| The lower corner |

 |
| Using the environmentally friendly paint stripper. I also remove the Artex on the ceiling which was relatively small compared to the Living room. |
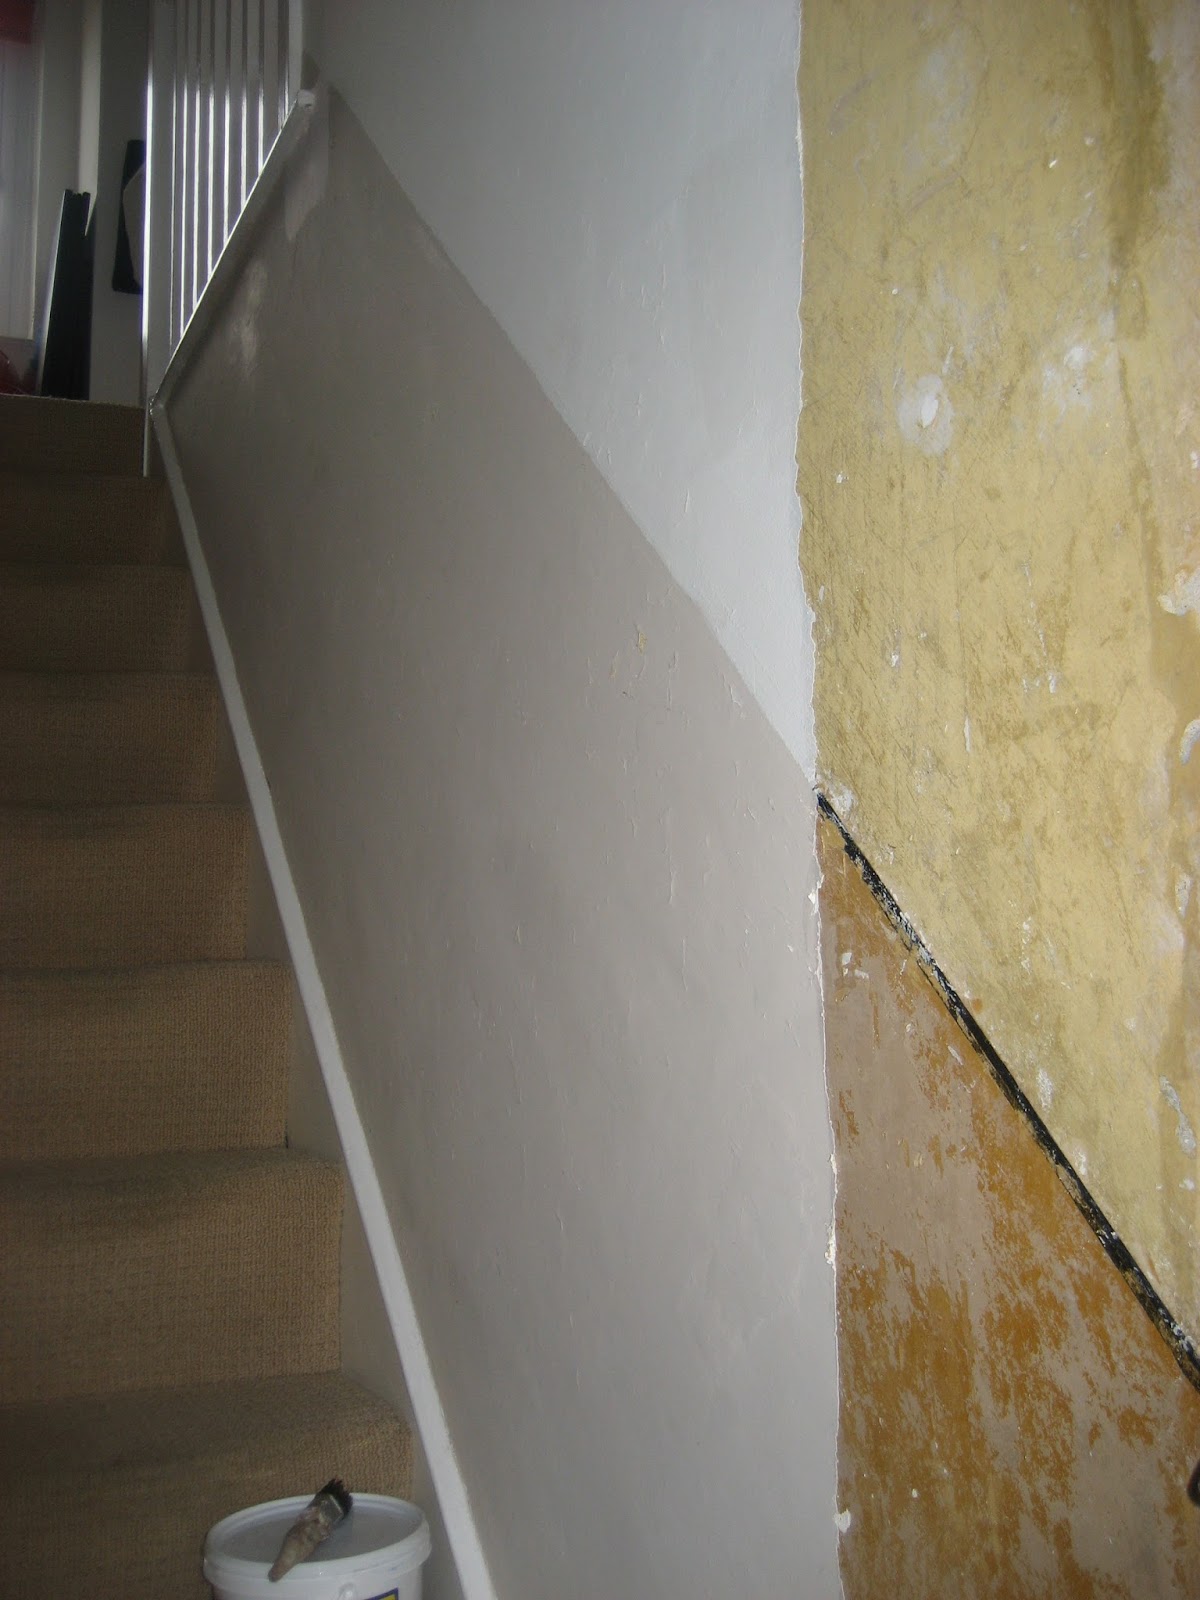
Mid removal of the modern paint revealing the 1930's colours.
In the second photo you can see how the light caught the way the paint was lifting. I decided after much effort that this is because the old layer of paint were breaking down and becoming friable.
 |
| Here the paint was starting to flake at the bottom of the stairs |

It took a while to understand the problem but the flaking was always near the chasing in for the electrics. The plaster used for the chasing in appeared to have not been sealed so the paint was finally flaking off.